Unit 5 2.1 2.2 2.3 2.4
What follows is a total mishmash of notes that I should have typed up the day after I made them, so I had a clue what some of them meant. They are a bit scrambled and need to be deciphered further.
Our class studio is kitted out with Elinchrom studio lights; softboxes, umbrellas etc. The lights are LED lights, (I think you can select how many lumens you use and even adjust the colour cast – but need to check that!)
Studio lighting used to be continuous and tungsten, but this meant models got very hot.
STUDIO KIT: Basic lighting can be altered dramatically by the use of various modifying attachments known as reflectors, dishes, bowls etc. They can be used individually or together to create a huge array of effects.
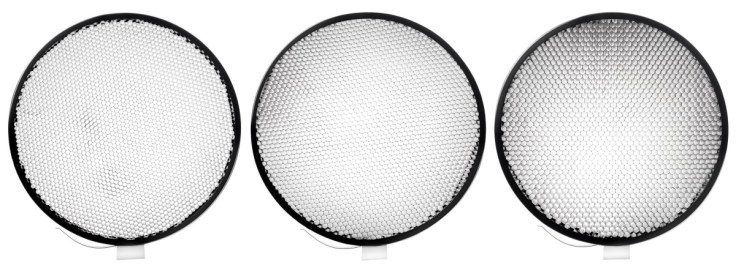
Grids: a honeycomb-style mesh that creates a multitude of light rays, a grid will give a precise, directional light. See here on Elinchrom for more info. They come in varying degrees values: the lower the degree, the narrower the beams of light produced.
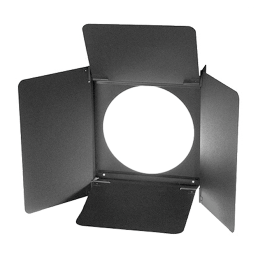
Barn Doors: hinged doors on a frame that you attach to the light, these allow you to vary the direction and strength of light depending on their angle and how open or closed they are. They have no effect on how soft or harsh the actual light is, they just focus its position and size.
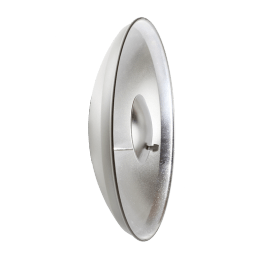
Beauty Dish – this is a UFO-style dish with a central reflector. The grey, porous interior absorbs the light and the cap diffuses it further. Creates very soft, diffused light and very soft shadows. Good for portraits, hence the name. Add a diffuser to soften even more.
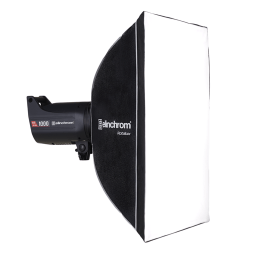
Softbox: These come in varying shapes and sizes and are a very popular accessory in studio photography. Used to control into a more contained area and present it spreading too much; the bigger the softbox, the softer the light and the wider its coverage.
Umbrella: allows light to spread out. Good for group shots. Use umbrella close to the light and the shadow becomes just a hint. Or turn the light away and use the umbrella to bounce it back.
Cone reflectors are good for strong light and shadows, like you’d get on a bright, shiny day.
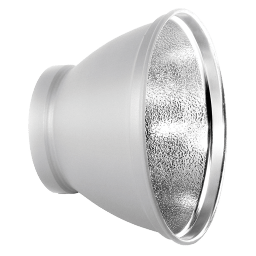
The size and interior surface of a dish have an effect on the tone of light created. Regardless of what light you use, the closer the light to the subject, the softer the shadows will be. Conversely, the further the light from the subject, the harder the shadow.
All the attachments shown on this page are from Elinchrom. The Elinchrom website has some really informative content that shows the effect of different lights and attachments – so it’s worth a nose if you are trying, as I am, to get your head around how all this kit works and why you might ever want it.
WHAT ABOUT THE CAMERA SETUP:
DSLR = Now no need for polaroids; light meter obsolete. Just do test shots and tweak accordingly.
Manual is the only set up to use. No point using anything else.
ISO = ideally 100
SS = 100 max, because unless you have HSF on the studio lights, you risk the black “curtain banding” that comes from using too high a shutter speed. This is where only part of the sensor is exposed at the point of flash, so only part of the image is recorded. I found it hard to get my head around why this happens so I had to break it down into teeny chunks that my
Curtain banding is caused when only part of the sensor is exposed at the point of flash, so only part of the image is recorded. I found it hard to get my head around why this happens so I had to break it down into teeny chunks that my tecchy-averse brain could comprehend…
The nano-second the shutter is released to take the picture, the front curtain starts to open and move across the width of the camera sensor.
BUT, because of the high SS, before the front curtain opens completely and clears the sensor, the rear curtain starts to close behind it, covering an area of the sensor.
The about-to-sync flash isn’t paying attention to the rear curtain, though. It’s waiting for that front curtain to still open fully. At the point that the front curtain clears the sensor, the flash syncs, fires automatically and lights up the subject.
And that light is what the sensor is primed to record, so it grabs it.
Problem is, the shutter speed is too fast, so the rear curtain is already closing, covering part of the sensor as it does so. The part of the sensor that is obscured doesn’t get to see or grab that flash of light and the information it provides, but only the ambient light that’s been hanging around the whole time. And that’s why you get the black “curtain” band effect.
Most standard studios aren’t HSS, but that’s fine as you can use slower shutter speeds as the light speed will be the only burst of light that the camera captures – so the flash could be, say, 1/8000 but even if the shutter speed was 1/2 second, it’s only going to fully capture that 1/8000 of a second that the flash illuminates the subject for. Hence why you might as well stick with 1/100 of a second.
APERTURE IS THE MOST IMPORTANT THING TO CONSIDER. (Presuming you’re not trying to capture movement, it’s the only thing you need to consider.)
The Flash Set Up – the relationship between power of flash, focal length and aperture and how they tie in – is the puzzle here. Higher power flash needs a higher aperture.
Multiple Exposures – possible with longer shutter speed and multiple flash hits.
Studio tip: Some studio lights will discharge any built-up power automatically. Some you will need to do manually so you will need to fire them off to discharge any built up power before resetting their power level.


Unit 5 2.1 2.2 2.3 2.4
LikeLike