Week 5: Jpeg Versus Raw
 Digital cameras offer two file formats for saving images: JPEG or RAW.
Up until now, I’ve only ever shot using JPEG. All I knew about RAW was that it was something professionals did.
So, here’s how I now see it:
JPEG – ADVANTAGES:
- Processed ready for printing; email etc.
- User-friendly format.
- Universally accepted.
- Open with any software.
- Small file size – so internet friendly.
- Good for fast, continuous shooting: sport/wildlife etc.
- Can be sent straight away if your camera has wifi – so good for news reportage etc.
JPEG – DISADVANTAGES
- Processed in the camera, so you have NO control.
- Quality is not as good – it’s a lossy file format. Basically, the camera compresses the information it captures and discards info as the file is recorded – so you lose info.
- Can’t recover anything the camera chooses to disregard.
- The moment you edit a JPEG you lose more information with every save you make. There is a constant loss of quality.


RAW – ADVANTAGES:
- No in-camera processing
- Information is captured in its purest form
- Far better quality than JPEG – use RAW for exhibitions etc.
- The only setting on the camera that will influence the final quality is ISO. Nothing else will alter it.
RAW – DISADVANTAGES
- Images are in their raw state, so you have to manually process every image that you want to publish.
- Large File size = 4 to 5 X greater than JPEG
- You need specific editing software to deal with it.
- If your memory card corrupts, JPEGS are much more easily salvageable. (NB: On important jobs, switch cards as a safety measure.)
- No good for fast continuous shooting – the camera can’t cope and won’t record the information quick enough.
RAW is just a generic term for the file format. Canon calls it CR2. Other brands will have their own terminology.
EDITING
Editing RAW images allows you to add small nuances or make radical changes. It’s a sophisticated process and, either way, you can completely alter how the viewer perceives the image. Conversely, post-production a JPEG is quite harsh.
Different editing software for RAW ranges from freeware such as Raw Therapee to Photoshop. I have started off just using Mac Photos but it’s fiddly and non-intuitive, so I may also use the Canon software to see how that compares. I have access to Photoshop – by all accounts the best editing software – but not a clue how to use it yet. Another course worth taking, maybe. For now, though, I am doing a lot of twiddling of levels and just going with whatever catches my eye. I believe that – on a professional level – there is a fair bit more to it than just that.


WHITE BALANCE
White balance can be customised according to the current light conditions in a similar way to setting your light reading. However, our tutor advised that this is seldom essential as so much can be done post-production. For now, just keep it on AUTO.
TIMESAVING TIP 1:
CHANGING RAW FILE BATCHES INTO JPEGS ON A MAC
I took hundreds of shots in the past few weeks and then spent hours sifting through them and editing the RAW versions. Some turned out better than others, some were only fit for the bin. It took an age. But then, when I was finally finished, I had 84 images that I wanted to upload to here. Problem was, they were all in the RAW format. I couldn’t seem to find an easy way to “Save As”. Thank God for Google, where I found the answer.
- Create a new folder on your desktop – call it whatever you want.
- Select all the RAW files you want to save as JPEGs
- Click and drag RAW files into the new folder on your desktop.
- Voila – the files somehow turn into JPEGs in the transfer. Job done.
- Post a comment saying how grateful you are to me for teaching you this lifehack.
TIMESAVING TIP 2:
RESIZING MULTIPLE IMAGES ON A MAC TO UPLOAD TO WORDPRESS
Up until now, I’ve been individually resizing every image I have uploaded to WordPress via the wp-admin media page. Laborious and boring is an understatement. Well, not anymore, sweetcheeks, for I’ve found a shortcut. So, moving on from tip number 1, once all the files have transferred as JPEGS, this is what you do:
- Presuming you’ve just done tip 1, select all the files in the desktop folder that you want to upload. (And if you haven’t already done that, make a new folder, select all the files in photos that you want to upload, and drag them into the new folder).
- Right click and select “open in preview”.
- Wait for preview to open with all the images.
- Then select all the landscape shots, go to the Tools menu and select Adjust Size.
- Put 1500 (or however many pixels you want) into the width box. Leave the height box empty. Make sure you click the Scale proportionally box.
- Click OK.
- Do the same for all the portrait shots, but this time put 1500 into the height box. Leave the width box empty. Make sure you click the Scale proportionally box.
- Click OK.
- Voila: all your photos that you want to upload are now resized, ready for easy uploading.
- Thank you. You’re welcome.
These two tips have literally saved me hours and hours of work. Hopefully, they will do the same for you. If so, let me know. And if you have any cracking lifehacks of your own, feel free to share them via the comments box, too.
OUT AND ABOUT
WOLFGANG TILLMAN, 2017, TATE MODERN
(No, I didn’t take photos in the exhibition. I bought postcards and took photos of them.)


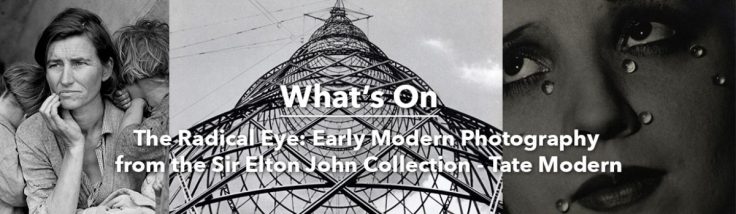
As an aside, there are two phenomenal photography exhibitions on at Tate Modern at present: Wolfgang Tillmans, 2017, and A Radical Eye – Elton John’s incredible collection of modernist photography. If you’re remotely interested in photography (and, chances are, you may be if you have read this far), then go see both while you can.


Unit 1 1.1 2.3 2.4 2.5 2.6
Unit 2 1.1 1.2 1.3 1.4 2.1 2.2 2.3 2.4 2.6
LikeLike