Week 3 – Part 1: ISO
Once upon a time, children, there was a thing called FILM.
I know it sounds incredible, but you needed to buy this special FILM and actually put it into your camera if you were to have any hope of taking a photograph! Yes, really! This magic film would only allow you to take a ridiculously small set number of photographs – typically, 24 or 36 – and, once you had taken that number, that was it. You had just the one crack at it and there was no chance of going back and deleting dodgy shots.
You got what you shot – nothing more, nothing less.

Once you had taken all your photographs, you then needed to remove the magic film carefully from your camera and take it to a developer (usually called Boots) who, in return for real money, would hand you back a paper wallet containing actual, real photographs AND their negatives.
And only then would you realise that you had forgotten to take the lens cap off.
Joking aside, there is a generation of Snapchatting selfie-takers who haven’t the faintest that film even existed. Let alone that, when buying it, you had to choose the correct ISO (film speed setting) to suit the photographic genre that that particular film was going to be used for; be that snapshots of your first beach holiday in Benidorm (lots of sunlight = low ISO) or Granny’s 80th celebration at the local Harvester (a difficult one: plenty of candles on that cake, but still, you’d probably want a higher ISO to compensate for shooting inside at night in a badly lit room with brown food and brown wallpaper).

The fact that you could even buy a film that had a set, regulated speed was all down to the International Organization for Standardization (that’s their spelling, not mine – those Zs make my toes curl). ISO, as it became known, is a non-Governmental body responsible for developing universally accepted industry and commercial standards: one of which just happens to be a regulated scale for measuring sensitivity to light.
Until digital cameras snapped onto the scene, ISO was used to refer to how sensitive camera film was to light. Nowadays, more commonly, ISO refers to the sensitivity of a camera’s digital image sensor.
But whether you are shooting film or digital, one thing stays the same: together with aperture and shutter speed, ISO is one of the 3 factors that affect exposure.

ISO DOUBLES LIGHT SENSITIVITY WITH EACH STOP: 100/200/400/800/1600/3200…
So 200 ISO is twice as sensitive as 100 ISO; 400 is twice as sensitive as 200 (but four times as sensitive as 100) and so on. And, as with all things photography, the better your camera, the more sensitive a sensor it will have. So while my camera’s ISO range extends from 100 to 6400, others extend to 25,600 and beyond.

ISO – THE HIGHS AND LOWS
HIGH ISO = Increased Sensitivity – useful when:
- shooting in low light but can’t use flash and/or slow shutter speed (and tripod) to compensate for lack of light
- For capturing action – a moving subject frozen in time – so need a faster shutter speed.
- Greater depth of field (to compensate for small aperture required)
Good for shooting indoors; sporting events; the Theatre (no flash) etc.

In bad daylight (cloudy, grey etc) you may also need to raise ISO to capture movement; but you should leave it as low as possible for landscape or portrait shots as clarity/quality is vital and there should be enough light.
The higher the ISO, the lower the image quality. Pictures will be grainier. This is because you are pushing the sensor to capture the image using less information than is ideal, so something has to give. Like listening to a crackling radio, you will still get the overall message but it won’t be as clear.

LOW ISO = Better quality images; less noise/grain; better colour; better definition.
- Basically, it’s better. Use as low an ISO as possible to capture the image you are after.
- Useful when shooting in very bright light to compensate for excessive light.
The only drawback to LOW ISO is decreased sensitivity.
Not good in low light, especially if you either can’t compensate with slower shutter speed (and tripod) or your subject is moving. That’s about it, really. Only increase it when you absolutely have to. Remember, even at night, tripod use allows for low ISO when shooting static images, because you can compensate with a much longer exposure time.
Nowadays, with digital, we’re spoiled for choice. We can alter our camera’s ISO settings to suit each image we take in our attempts to achieve the highest image quality possible.
The ISO setting has a knock-on effect on the aperture and shutter speed you use – and vice versa. But I’m still trying to get my head around how ISO and aperture work, so that’s your lot for now otherwise my brain will explode.

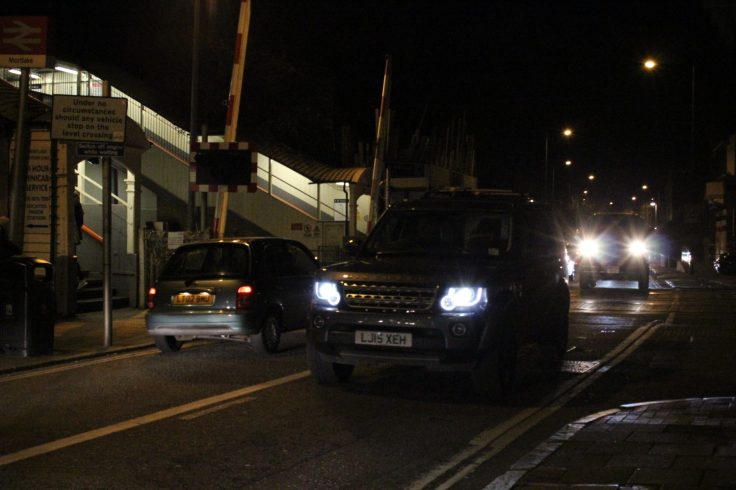
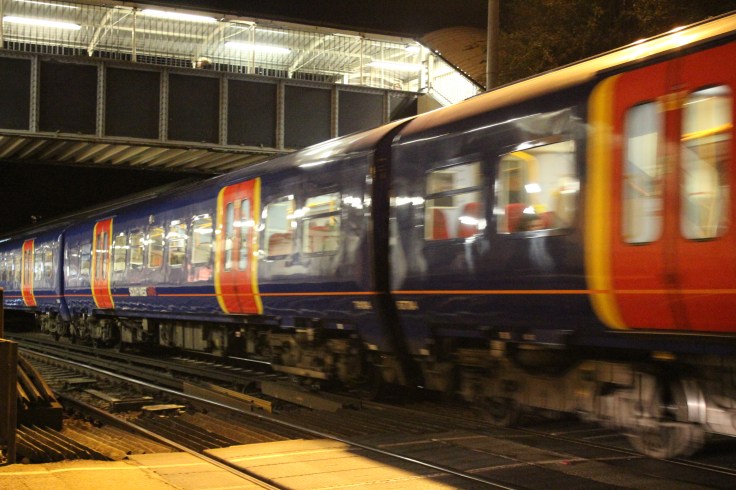
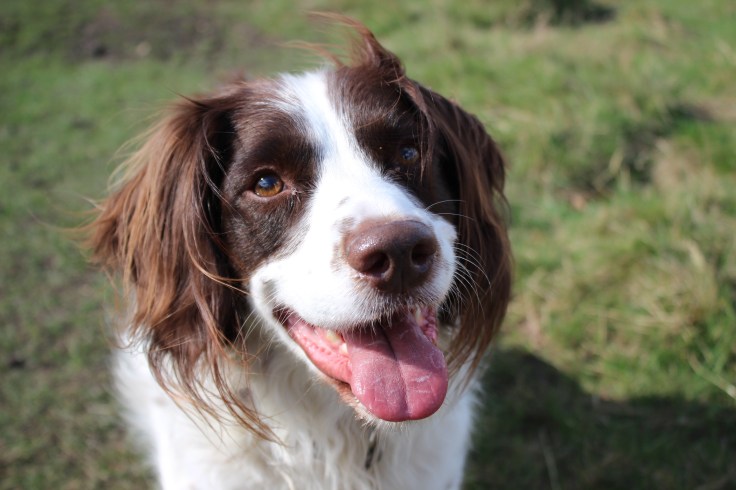
Homework this week was to try to capture a moving image in low light. At least that’s what I think it was: maybe it was just using a high ISO to capture a moving image, or using a high ISO to film static images at night? Maybe trying to do both is ridiculously hard? Either way, I struggled with this. Attempts at filming boys playing football at night were abysmally blurred. Slightly better were some street shots of cars and trains and, later that evening, a bartender mixing cocktails in a dimly-lit bar. It seemed that – lacking the know-how to pick the correct shutter speed – the only thing that came close to working with a high ISO was a low aperture setting. That and using Daisy the dog as my subject.
Something to work on. I’m not happy with any of the other images on here, so expect an update as I get my head around this conundrum.


Yeah I have heard about this here “Magic Film” …. who am I kidding I’m old enough to have used it !!
LikeLiked by 2 people
Unit 1 1.1 1.5 2.3 2.4 2.5 2.6 2.10
LikeLike