Last week’s class looked at Broad and Short lighting. Having got my head around Butterfly; Loop; Split and Rembrandt lighting (although, tbh, achieving them in the studio is still a hit and miss affair), this new info-dump wasn’t that hard to grasp. So here’s a bog simple explanation:
Shoot from the shaded side of your subject’s face = short lighting
Shoot from the lit or sunny side of your subject’s face – broad lighting.
Short lighting emphasises shadows and, particularly when used with Rembrandt or loop lighting, can thin or shorten a face.
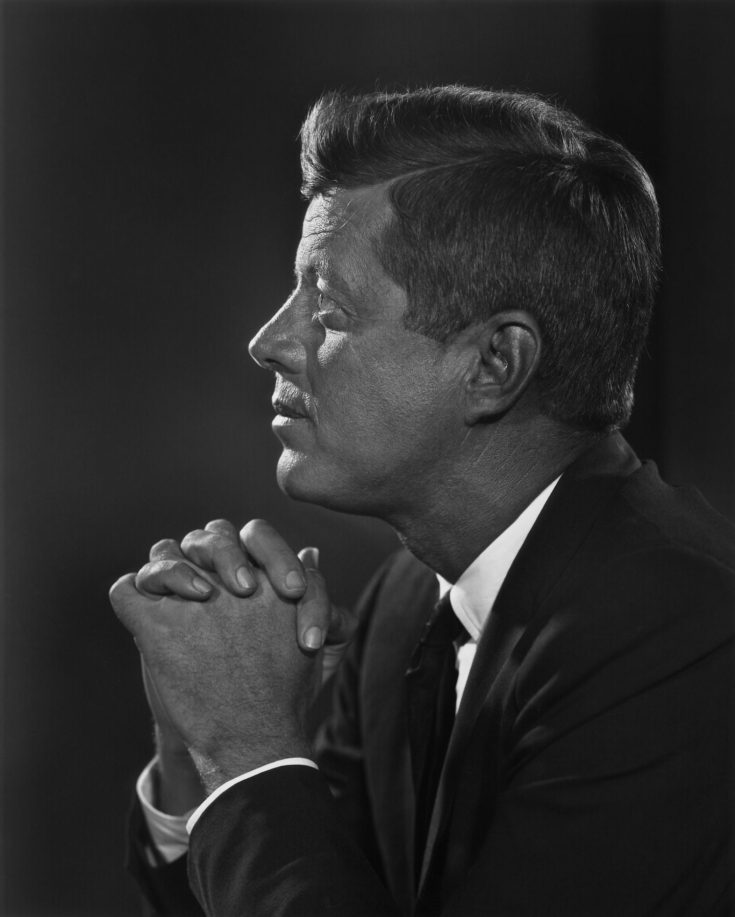
Yousuf Karsh was a fan of short lighting – his portrait of Kennedy uses Rembrandt lighting and is shot completely side on/from the short side.
Rim Lighting (also known as back lighting or hair lighting) is simply a light placed on your subject in such a way so that you have an entirely dark background and only capture a light outline of your subject’s shape. Pretty much the entire shot is dark – just the outline shows up – so kind of the opposite of a silhouette, where your subject is completely dark against a light background.
The easiest way to do this is to have the light right behind (and obscured by) your subject. So split lighting in such a way that half of your subject is lit – but not the half that you are photographing… if that makes sense. For instance, Karsh could have achieved rim light on the shot above by split lighting Kennedy and shooting from the same short side, so as to only catch the light hitting the very edge of Kennedy’s profile. But he didn’t. And who am I to argue with that?
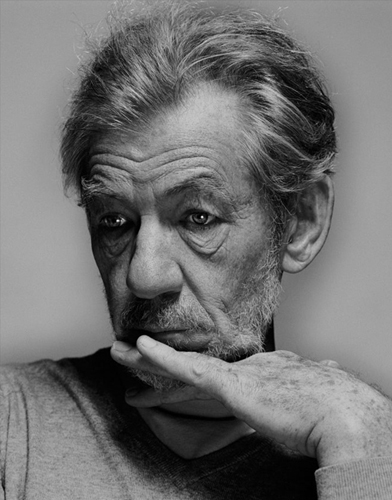
Broad lighting can make a face look wider, gives less definition and usually means your subject’s going to need a bit more slap to look halfway decent if that’s the image you’re after. But it can also highlight character, as in Nadav Kander’s phenomenal shot of Ian McKellan. Here the light comes in from above to throw and increase shadow.
MEANWHILE, BACK IN CLASS…
As most of us had finished our still life shots, we used our time in the studio to experiment with Rembrandt, Loop and Split lighting and see how shooting from the broad or the short side could change the effect of all three lighting patterns. Our classmate, Jo, was our willing, patient and lovely model. Poor girl.
SPLIT LIGHTING ATTEMPTS
As an exercise, this went ok, although I don’t think they are the best shots of Jo from the night.


LOOP LIGHTING ATTEMPTS
Not the best loop lighting, admittedly… loop not as defined as it should be and encroaching into a half-arsed Rembrandt at times. That said, I do think the lighting style suited Jo and, hopefully, she will like a couple of these. I do.


REMBRANDT LIGHTING ATTEMPTS
It was quite hard to get just the right bit of Jo’s face lit, tbh! (Memo to self: turn classroom lights off; it makes it easier to work out what the studio lights are doing.) Personally, I think the lighting was too harsh and the shots don’t work as well as the loop selection.


In writing this post, I’ve scoured the internet for some decent lighting tutorials about basic lighting styles and found some useful info here at sekonic.com and here at digital-photography-school.com.


Leave a comment